Couch Crafting
Crafting Anytime, Anywhere.
Wednesday, February 26, 2014
Upcoming Crochet Projects
Today's post is just a quick update to keep things going! I'm working on a couple of things right now, but none of them are remotely finished. So! I figured I would do a general update on some upcoming and current crochet projects.
Thankfully, the repetitive motion injury in my wrist has finally started getting better, so I've started a new crochet project. My husband randomly decided that he wanted a crochet helmet. So we went searching and found Rebekah Bowers' Gimli-inspired helmet and beard pattern on Ravelry. It's epic, with a detachable beard, so that's the one we decided on. It's a bit expensive material-wise, but it's totally worth it.
The only change I'll be making is a brown beard instead of a red one. Also, Rebekah is a great help--I was having trouble with the gauge for the helmet base, and she was happy to give me plenty of tips. Also, her pattern is incredibly clear, with lots of good pictures. This will probably take me a few months to complete (just in time for full Louisiana summer!), but I can't wait to have a finished product!
For my other projects, my husband got me the two following amigurumi books for Valentine's day. He had the awesome idea that I could make Lord of the Rings/Hobbit characters--and with these books, it's totally possible!
Doherty's Amigurumi!: Super Happy Crochet is best for making the funky characters, animals, and foods in the book. But you can make some really cute gifts and projects with it. Also, there's a deer pattern that could probably be adapted for My Little Pony projects!
Hoffman's AmiguruME: Make Cute Crochet People is EPIC. It's not "how to make Mr. T or Beyonce": it's "here's how to make this kind of head/hair/body/feet." It's MEANT for you to create your own people by combining pattern pieces. I've already listed the pieces I need to make Storm from the X-Men, plus Bilbo, Gandalf, and Thorin from The Hobbit.
I AM SO EXCITED.
Now I just need a job so I can afford all the yarn!
Sunday, February 16, 2014
Petal Hip Scarf Tutorial
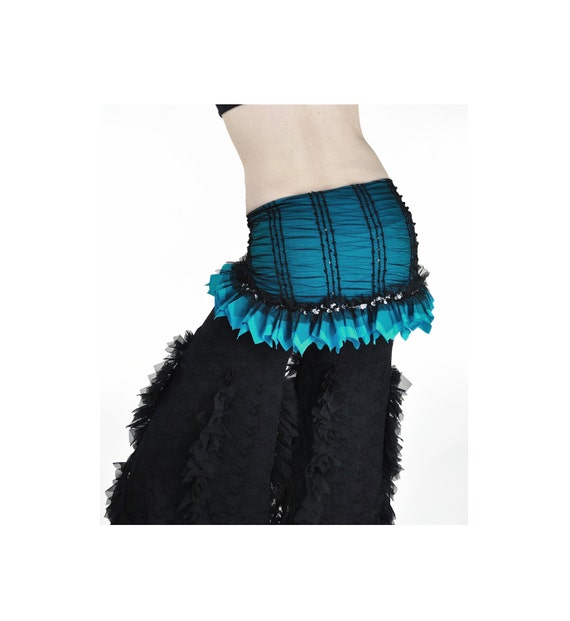
While my poor black bra top sits in the development hell of my indecision, I got inspired to work on something else. Namely, an awesome hip scarf that my belly dance instructor wears (one of many awesome hip scarfs and belts, I must say). It was made by another longtime dancer in the studio, but it looks just like this one on Etsy:
Seller dreamingamelia has several of this, but I love this one's color. |
I had some leftover royal blue jersey from an infinity dress I made a few years ago*, and I thought this would be a good opportunity to use it. Plus, it gave me something to do that didn't strain the repetitive motion injury I gave my wrist with all that crocheting last month! (Wrist braces are my friends.)
*Two notes: One, you do need a good amount of fabric for this, probably at least 2 yards, but I didn't measure how much I used here. Two, infinity dresses do not look good on me. Nope nope nope.
So anyway, I started off by getting a basis for the scarf itself. I used my red pirate hip scarf as a template, pinning it to the jersey and rolling the excess up so that I could get the shape I wanted. Unfortunately, I (again) forgot to take pictures of this bit. Basically, you just want a slightly curved top edge, and a really wide, upside-down bell curve for the bottom edge. Make the ends extend for the ties, unless you want them to be of another fabric entirely. Also, to help you get a good length, measure from the base of your back to however low you want the hip scarf to go (I advise the lower edge of your butt), but don't forget to leave yourself space for seam allowances.
I did not measure my butt length (that sounds weird), so I ended up having to trim this down a bit as I went. |
Now, sew up the bottom seam, all the way, from tie-end to tie-end. Note, if you haven't sewn with jersey before, it can be a little nit-picky. You need a ballpoint needle to keep from micro-tearing the fabric, and the fabric likes to bunch or overstretch depending on your tension. For my machine, without messing with bobbin tension, the fabric sewed best on a very small zig-zag stitch on medium-low tension.
Once you've sewn the seam, hold the top seam and place the scarf around your hips (you can even tie it on) the way you would wear it. Use this to check the scarf length and shape. Make any adjustments you need to now--it's much harder (if not impossible) to make certain changes later. If everything's good for size and shape, put the scarf on again, and mark how far you want the petals to reach in the front.
My pins were a few inches from the tie, right in front of my hips. |
Feel free to make multiple folds in your fabric so that you can cut 3-4 squares at once! |
Now that you have all of the squares cut, lay the scarf flat, fold in half, and mark the bottom center.
This new pin will mark our starting spot for the next step: sewing the squares (petals) to the scarf.
Technically, you don't have to start in the center, but it helps keep things even. Unfold the scarf so that the seam lies as flat as you can get it, right-side up. Try to make sure the seam allowances are facing the same direction all the way across--it won't mess anything up if they get a little wonky on the inside of the scarf, but it's nice to have them tidy.
The lighting here suddenly made my fabric look grey.... |
The angle of this shot makes it look incredible off center. Also, put the pin in parallel to the seam, not perpendicular like you see here. It will make it easier to keep things straight. |
I actually was able to use a small, straight stitch here just fine. |
Tada! Your first petal is done! I used back-stitching and tying ends to help make sure the stitching would hold up with all the dancing this will be going through.
Now repeat. A lot. Your petals will start piling up. Push them opposite the direction you're laying new petals down.
Lay each new square, folded in half (see below) about 1/2"-1" away from the tip of the previous petal.
Unfold the square and pin along the seam. I used the point of the pin to show where the tip of the previous petal was. This helped me see where to drop my needle, kept everything in a nice line, and kept my petals tightly spaced without overlapping. Feel free to have some overlap if you want a REALLY fluffy skirt, but you'll have to be careful sewing, and you may need a lot more squares depending on the overlap.
That crease at the pin's point is the sewn tip of the previous petal. |
Starting with the center, I did one side and then the other. This is actually really easy--it just takes a while. Feel free to try on your scarf as you go and see how it's looking!
Feel free to add more. Once you're done, though, you're finally ready to sew the top. Turn the scarf inside-out, and match up the edges. The petals and embellishments will make things a little awkwardly lumpy, but it'll be fine. Sew from one tie to a few inches from the center, then do the same on the other side. The center gap will let you turn the scarf right-side out again, and then you can slip-stitch it closed.
And we're done! The petals have some AMAZING movement during twists and shimmies.
Tuesday, January 28, 2014
Crochet and Big Life Changes
So, I started this blog originally because I felt like my creative life was being drowned in dissertation work and other obligations. Last semester was a time of huge upheaval in that regard, and I ended the semester by going on academic leave. So now, a month-and-a-half later, I'm still hunting for a full-time job, but I have a part-time job writing scripts for study guide videos for an Australian company, I've started a new class in bellydance, and I'm excited to not be constantly dogged by the guilt and stress of the dissertation. I may go back next fall, but I'm not sure. The unfortunate truth is that the Ph.D. CAN be worth it for an alt-ac/non-ac job, but it can also be a hindrance. So, we'll see. In the meantime, I'm trying to jump back into craft mode (and blogging mode!) post-holidays.
I have a bellydance costume in the works, but I keep struggling with some beautiful but very unforgiving fabric and a deadlock over how to decorate the bra. I've got a ton of ideas, but I'm just not sure which one to run with:
I cannot get this darned thing to load right-side up. And this one is my favorite, too. Sigh. |
In the meantime, I finally got around to learning a new hobby that I'd attempted, failed, and put off at least twice: crochet. I've been knitting for years, now, although I rarely do anything more complicated than a basic garter stitch or knit 2, purl 2. I mostly make blankets and scarves for family members, and it gives me something easy but productive to do while watching movies or TV. Decorating a dance bra requires a lot more concentration! Anyway, I'd been interested in learning crochet with the number of neat patterns online, especially for bellydance stuff. But every time I'd tried, I kept making miserable, curled up swatches that looked terrible. So I gave up and figured I'd try again another time, maybe when I had an actual person to show me how, rather than a YouTube video.
Well, true motivation came last week, when my bellydance instructor asked us to bring zills, preferably with mufflers. I finally bought my own zills back at the Texas Renfaire in the fall, but I had no mufflers. So, I looked up some patterns, bought lace weight yarn, and I was ready to try learning knitting in the round (something else I'd never attempted). Unfortunately, it was the day of the class, and I got home to discover that I didn't have the right needles. I have a huge stash my grandmother gave me, but it's a random assortment. There was no going back to the store, so I decided "what the hell" and pulled out a crochet hook and a crochet pattern, ready to learn, hardcore.
Before I started the crochet, however, I knew I didn't have time to finish them before class, so I made some fabric zill covers according to this SUPER EASY tutorial at The Tribal Way:
Tribal Way Zill Mufflers - She takes lovely pictures and also has lovely hands, don't you think? |
It was HARD. I probably unpicked and restarted the pattern 7-10 times before I actually started getting it right, and I watched and re-watched one particular video (I'll link to it when I can find it again). I actually ended up switching patterns halfway through, too: I started with the Pretty Petaled Zill Covers by kNew England Knitter, but I couldn't understand how to get from one petal to the next, so I switched to Shira's Large Spider Web Zill Mufflers. The spider web pattern was much easier to follow, but it still took a few tries to get it right.
I finished the first one that night.
Tada! Here is my first one and my fabric muffler:
I didn't get the center shape in the crochet quite right, but once I got farther out, I got more used to the tension and technique.
I was ADDICTED. In the past 5 days, I've made three more covers and attempted a crochet slave bracelet.
For the bracelet, I used the free bejeweled bracelet pattern from The Joyful Dancer. I didn't understand parts of the pattern I, so I just did what seemed right. I got pretty much the right shape, but it's very loose. Also, the edges are a bit wonky. But for kind of making parts up, I'm okay with that!
Overall, I'm still working on loosening my stitch tension, but I'm getting better. I really enjoy how crocheted work comes together, and I like having only one needle. The only downside is that my left wrist hurts from the effort of controlling the work, the working thread, and the tension. But it's worth it!!
And, for a final, ferret note for the day, Ferret Nation cages are the best. We finally ordered one and set it up last Thursday. It's great and the ferrets love it!
Look how huge! |
Tuesday, December 17, 2013
Sleeping Beauty Apron
Well, this will be a short post today, because, yet again, I forgot to take progress photos until I was practically done. In my defense, I was thinking that I couldn't post about it, because this project was a birthday present for a surprise party for one of my best friends!
My friend Katie has always loved Aurora from Disney's Sleeping Beauty. Aurora is her favorite princess, her favorite color is pink, and she also likes to cook. So, in thinking about possible birthday presents, I thought about all those cute character aprons that have been all the rage lately. Unfortunately, I couldn't afford the really fancy, and even those I could potentially afford would have been stretching my budget and would never have made it in time for the party.
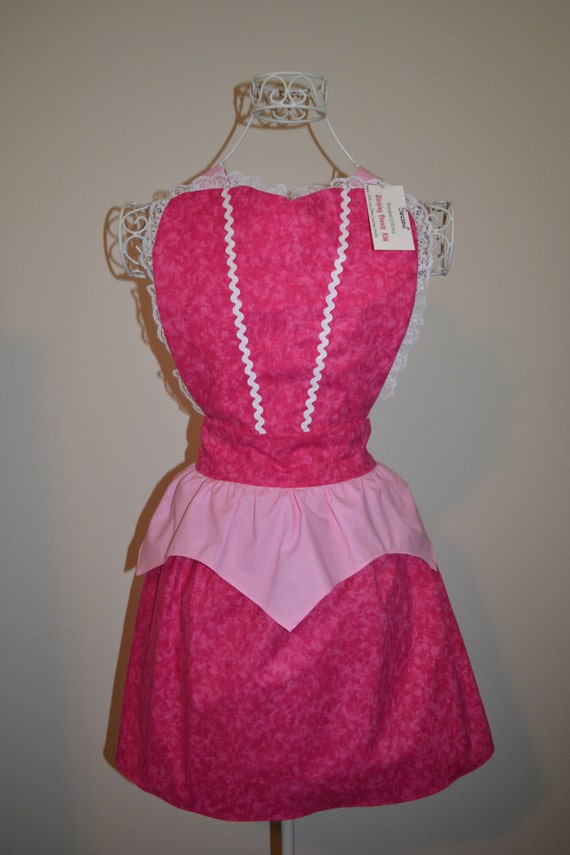
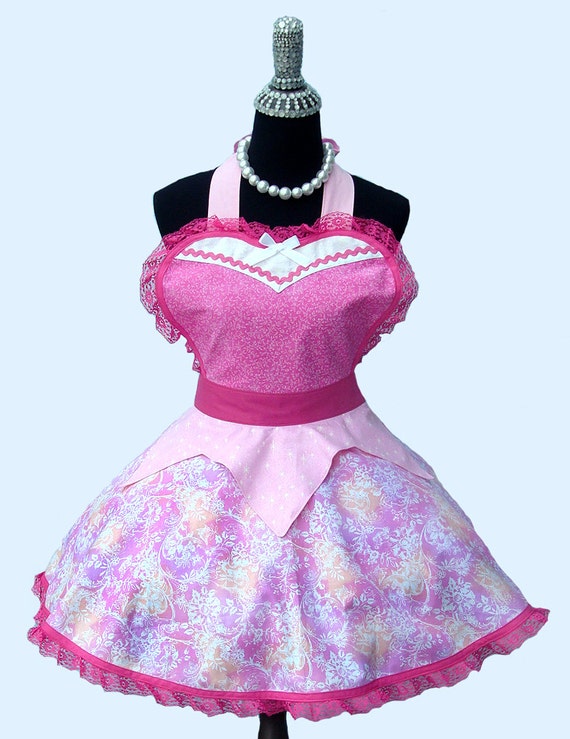
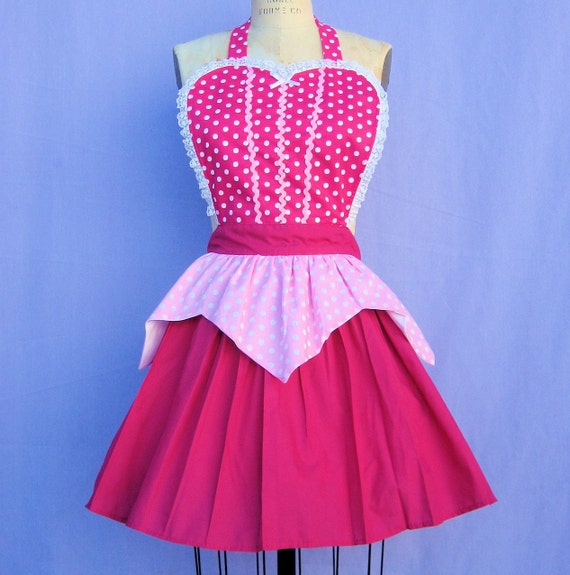
There are a ton of great options, and some good ones within a $30-50 range are available on Etsy. While I was searching, I came across these:
From SozzoniStyle |
From OnceUponAPoodle |
From loverdoversclothing |
So, between time, budget, and design, I decided to take a chance and make one myself. I was halfway through experimentally making my first-ever apron, no pattern, no nothing, and it thankfully had already taught me a few tricks about the order of operations. Unfortunately, I was also running into plenty of difficulties. For Katie's, I didn't have time to do a mock-up, and the Aurora apron would be more complex than what I was currently making. I hunted through apron patterns at the fabric store, but none of them separated the top from the bottom in a way that worked with the design I wanted. So it was all up to brain power.
I spent an afternoon drawing out the basic design, figuring out some basic measurements, and writing down the steps in the correct order. Even with all that time planning, I still ended up changing things (realizing that certain steps worked better earlier or later), so I won't post my unedited scribbles. (Although if someone does want clearer instructions, let me know, and I'll try to write up a better version).
The fabric was just the basic bolts on the wall--I didn't want to use fancy-dress fabric for the sake of utility and upkeep, and the cotton bolts were the only fabrics that came in the right colors anyway. I decided to buy enough for outside and lining on all the pieces, especially since I don't have a serger. I didn't want any rough edges on this baby.
1. After washing and drying the fabric, I started with the top of the dress. I used an old sweetheart corset pattern to get the seams in the right places instead of mimicking them with ribbon or trim, like many of the aprons above. I ended up having to take it in in several places, as Katie is much than I am in height and frame, but I think I estimated it pretty well. I did this for the outside and a lining.
2. Then, I cut interfacing and two of the white fabric (front and lining again) to make the collar and sewed it into the lining. This was difficult with the interfacing and shaping, especially with how small the collar was. I also made the neck/shoulder ties, which were excruciatingly thin for turning right-side out after sewing. I stitched those on the edge of the corset lining, away from the collar.
3. I cut the over-skirt using the measurements of the newly sewn corset top. I eyeballed most of the measurements, so I can't say exactly how everything measured out. The big trick was leaving room for the seam allowances to sew front and lining together.
4. Using the same measurements, I cut the underskirt, but I added about 4 inches to the top and bottom measurements so that I could put pleats in according to Aurora's skirt. The pleats on the animated dress don't really work in real life, but at least it would give a hint of the original and add a little body to the skirt.
5. I basted the over-skirt to the corset front and then sewed the underskirt on top of it, making the pleats by pinning them in and then simply sewing all three layers together.
6. In the picture above, you can see how I finally took pictures after sewing the lining of the corset to the front, just along the neckline. This was the trickiest part to sew with the sweetheart corset and straight/pointy (and stiff!) collar. I ended up having to hand-stitch parts of it to get it just right.
We need side straps! |
7. I remembered at this point that I still needed the side straps, so I sewed those up and stitched them into the lining.
8. With all the pieces in place, I sewed the sides of the corset, making sure I didn't accidentally catch the skirt or straps.
9. As the last step, I hand-stitched the lining to the bottom seam of the corset front, turning the raw edges in and using an invisible stitch so it looked perfect. Sadly, I did not take a picture of this moment of subtle artistry.
And voila! A finished Aurora apron, modeled by yours truly. The top could probably have been taken in even more, but for a first attempt with no real pattern and without measurements for Katie, I think it turned out pretty well! The only other thing I would fix is the angling of the bottom of the corset. I designed it to come to a lower point in the middle, like Aurora's dress does, but I didn't cut enough from the top skirt, and it ended up straightening out. It looks great on the hand-stitched inside, but then you don't get the over-skirt. *sigh*
Excuse the mess of broken-down boxes and bed frame that compose the back wall of my craft room. |
Thursday, December 12, 2013
Unicorn Cupcakes
So, this past weekend, we had a little bellydance Christmas party. I decided to make "sparkly unicorn cupcakes" after I promised them to one of the girls for a favor a few months ago. It also served as a celebration for finally getting a working oven after baking with only my toaster oven for the last 6 months. It's doable, but it takes twice the time, if not more, because you have to keep the batches small.
Anyway, there are probably a ton of better ways to do these cupcakes (and I've considered a bunch), but for my time and budget, this is what came of it.
So, to start off, these aren't from scratch. For the sake of time and ease, I used box Funfetti cake mix and pre-made icing, hot pink with pink sprinkles, for one of best friends.
Once I mixed up the batter, I ladled it into different bowls for dyeing. If you're OCD, beware. Not all colors matched the bowls. I apologize for the dearth of good pictures--I tend to think of taking them after-the-fact, but I'm working on it! Anyway, you can see the remnants of the different batters--five colors in all. I did ten drops of basic blue (Wilton gel food coloring, by the way) and about 7 drops for the neon colors, pink, purple, green, and orange.
The only two bowls that matched their batter colors, haha. |
With all the colors done, it was time to put them into the pan/cups. I did one color at a time and just eyeballed the amount.
While they were baking, I got to work on the "unicorn" part. Ideally, I would have liked a molded chocolate or sculpted marzipan (or fondant, but marzipan is tasty). Making unicorn-head cookies or something with a unicorn image would have worked too, but I just didn't have the time to find/get my hands on anything suitable. So, I went with my back-up.
Our local Alberston's had pearlescent candles in lovely pastels, so I bought two packs of those. While the cupcakes were in the oven, I used a standard butter knife to shave down the tops of the candles into a vaguely conical shape. It wasn't perfect, but it at least kept that spiral look that I wanted. I also decided to cut off the wicks; we weren't lighting them, so it didn't matter. I wish I could have combined these candles with the ones that have a colored flame....that would've been cool.
Shaved on the left, unshaved on the right. |
I am terrible at icing cupcakes. XD |
Apparently, Americolor will give you even more vivid colors; Wilton sometimes fades in the baking, at least in my limited experience. But anyway, multi-colored, sparkly unicorn cupcakes!
Subscribe to:
Posts (Atom)