Navigation

Showing posts with label sewing. Show all posts

Sunday, February 16, 2014

Petal Hip Scarf Tutorial


While my poor black bra top sits in the development hell of my indecision, I got inspired to work on something else.  Namely, an awesome hip scarf that my belly dance instructor wears (one of many awesome hip scarfs and belts, I must say).  It was made by another longtime dancer in the studio, but it looks just like this one on Etsy:
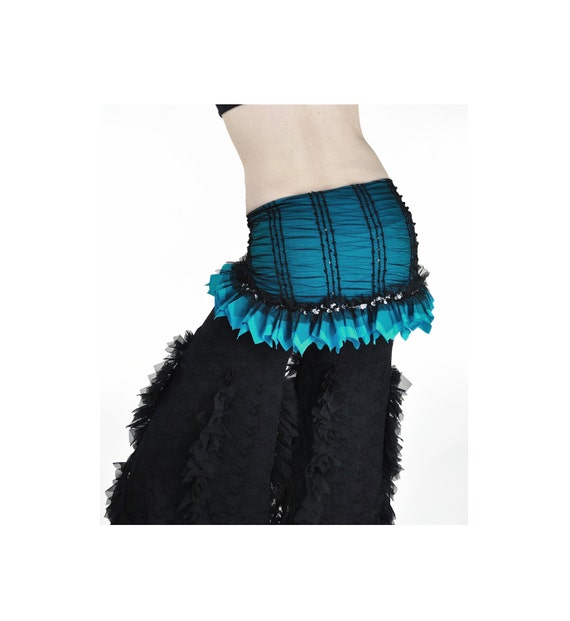
Seller dreamingamelia has several of this, but I love this one's color.


I had some leftover royal blue jersey from an infinity dress I made a few years ago*, and I thought this would be a good opportunity to use it.  Plus, it gave me something to do that didn't strain the repetitive motion injury I gave my wrist with all that crocheting last month!  (Wrist braces are my friends.)

*Two notes: One, you do need a good amount of fabric for this, probably at least 2 yards, but I didn't measure how much I used here.  Two, infinity dresses do not look good on me.  Nope nope nope.


So anyway, I started off by getting a basis for the scarf itself.  I used my red pirate hip scarf as a template, pinning it to the jersey and rolling the excess up so that I could get the shape I wanted.  Unfortunately, I (again) forgot to take pictures of this bit.  Basically, you just want a slightly curved top edge, and a really wide, upside-down bell curve for the bottom edge.  Make the ends extend for the ties, unless you want them to be of another fabric entirely.  Also, to help you get a good length, measure from the base of your back to however low you want the hip scarf to go (I advise the lower edge of your butt), but don't forget to leave yourself space for seam allowances.

I did not measure my butt length (that sounds weird),
so I ended up having to trim this down a bit as I went.
 Once you've got it set up, use this template to cut two pieces of your fabric.  If you want to do the sheer black overlay or embellishment, you'll want to cut that now and anything else.  I didn't have the fabric to do it, though, so there's no tutorial for that.  Also, if you want a firmer, smoother scarf itself, you can cut some medium-weight interfacing.  I didn't have any, so I just went with it as is.

Now, sew up the bottom seam, all the way, from tie-end to tie-end.  Note, if you haven't sewn with jersey before, it can be a little nit-picky.  You need a ballpoint needle to keep from micro-tearing the fabric, and the fabric likes to bunch or overstretch depending on your tension.  For my machine, without messing with bobbin tension, the fabric sewed best on a very small zig-zag stitch on medium-low tension.

Once you've sewn the seam, hold the top seam and place the scarf around your hips (you can even tie it on) the way you would wear it.  Use this to check the scarf length and shape. Make any adjustments you need to now--it's much harder (if not impossible) to make certain changes later.  If everything's good for size and shape, put the scarf on again, and mark how far you want the petals to reach in the front.

My pins were a few inches from the tie, right in front of my hips.
At this point, you want to cut a number of squares from your remaining fabric.  I made my squares 7" x 7", and I used about 25.  You may need more or less depending on how big your hips are, how closely you place your petals, and how long much you stitch each one to the scarf.  If you want an estimate, measure the curve between your marker pins, and divide this measurement by 2.  So if the curve measures 30", you'll cut 15 squares.  This is probably the minimum number you'll need, but it's enough to get started and see how things look once you start sewing.  Also, 6" x 6" squares closer together will probably give you a fluffier end result.

Feel free to make multiple folds in your fabric so that you can cut 3-4 squares at once!

Now that you have all of the squares cut, lay the scarf flat, fold in half, and mark the bottom center.


This new pin will mark our starting spot for the next step: sewing the squares (petals) to the scarf.

Technically, you don't have to start in the center, but it helps keep things even. Unfold the scarf so that the seam lies as flat as you can get it, right-side up.  Try to make sure the seam allowances are facing the same direction all the way across--it won't mess anything up if they get a little wonky on the inside of the scarf, but it's nice to have them tidy.

The lighting here suddenly made my fabric look grey....
 Remove the center-marker pin, and pin the center of the square where it was.

The angle of this shot makes it look incredible off center.  Also, put the pin in parallel to the seam, not perpendicular
like you see here.  It will make it easier to keep things straight.
 Now, sew the square the scarf  for 1" or 2" (your choice--I did mine around 2").  Try to sew as close to the seam as you can, and be careful to avoid folds or lumps in the scarf getting caught under your stitching.
 I actually was able to use a small, straight stitch here just fine
Tada!  Your first petal is done!  I used back-stitching and tying ends to help make sure the stitching would hold up with all the dancing this will be going through.


Now repeat.  A lot.  Your petals will start piling up.  Push them opposite the direction you're laying new petals down.  

 Lay each new square, folded in half (see below) about 1/2"-1" away from the tip of the previous petal.

Unfold the square and pin along the seam. I used the point of the pin to show where the tip of the previous petal was.  This helped me see where to drop my needle, kept everything in a nice line, and kept my petals tightly spaced without overlapping.  Feel free to have some overlap if you want a REALLY fluffy skirt, but you'll have to be careful sewing, and you may need a lot more squares depending on the overlap.
That crease at the pin's point is the sewn tip of the previous petal.
Starting with the center, I did one side and then the other.  This is actually really easy--it just takes a while.  Feel free to try on your scarf as you go and see how it's looking!  


 Once you have the petals all sewn on, you can add embellishments along the bottom seam.  I was able to get the perfect length of black ribbon 50% at Hobby Lobby, so I used that, keeping decoration simple.  Note, I'm doing this before sewing the scarf closed, that way the stitching doesn't go through the back side.  Again, though, be careful that the petals or back side of the scarf don't get caught up in your stitching!


Feel free to add more.  Once you're done, though, you're finally ready to sew the top.  Turn the scarf inside-out, and match up the edges.  The petals and embellishments will make things a little awkwardly lumpy, but it'll be fine.  Sew from one tie to a few inches from the center, then do the same on the other side.  The center gap will let you turn the scarf right-side out again, and then you can slip-stitch it closed.

And we're done!  The petals have some AMAZING movement during twists and shimmies.


Tuesday, December 17, 2013

Sleeping Beauty Apron


Well, this will be a short post today, because, yet again, I forgot to take progress photos until I was practically done.  In my defense, I was thinking that I couldn't post about it, because this project was a birthday present for a surprise party for one of my best friends!

My friend Katie has always loved Aurora from Disney's Sleeping Beauty.  Aurora is her favorite princess, her favorite color is pink, and she also likes to cook.  So, in thinking about possible birthday presents, I thought about all those cute character aprons that have been all the rage lately.  Unfortunately, I couldn't afford the really fancy, and even those I could potentially afford would have been stretching my budget and would never have made it in time for the party.

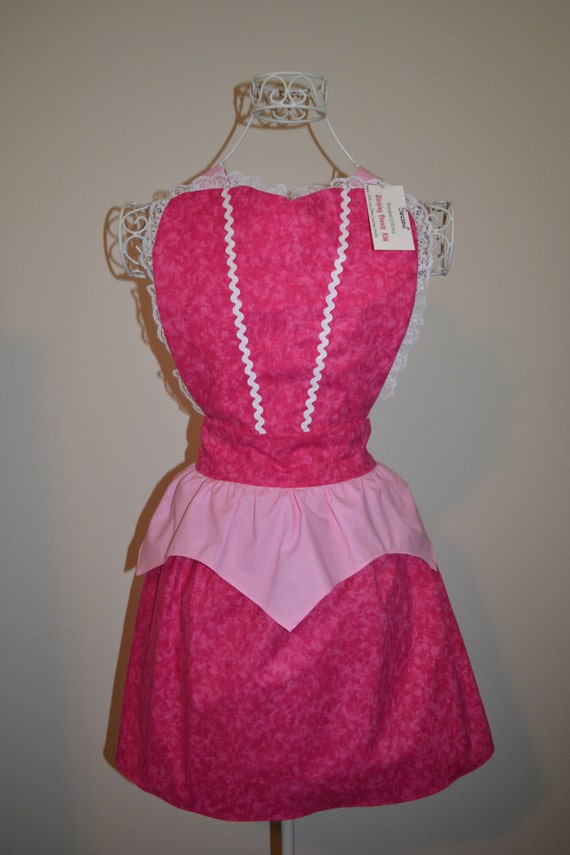
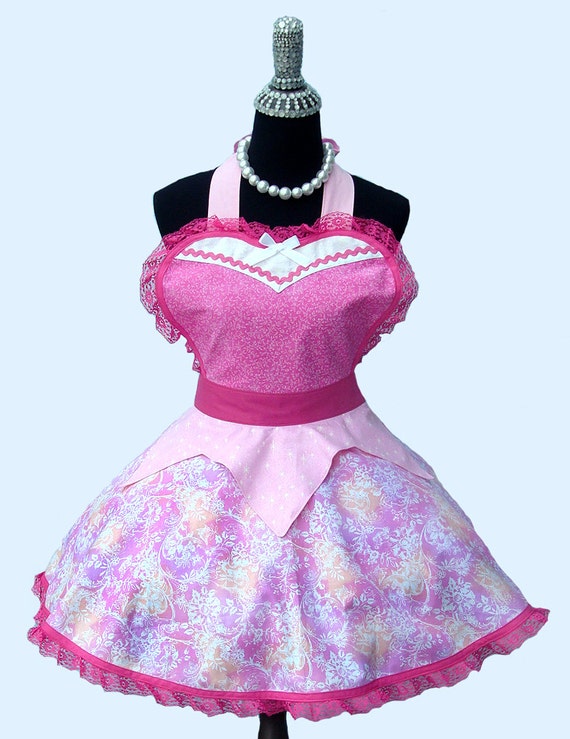
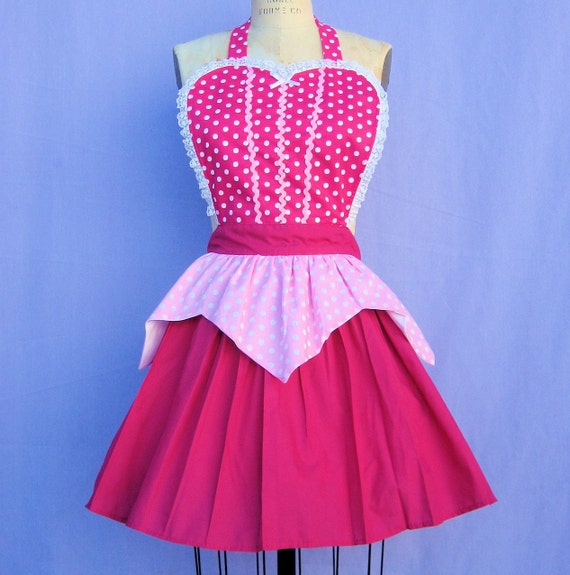
There are a ton of great options, and some good ones within a $30-50 range are available on Etsy.  While I was searching, I came across these:

From SozzoniStyle
From OnceUponAPoodle
From loverdoversclothing
They're all cute in their own way, and I like the retro flair they all have, but the second is my favorite, hands down.  Still, they all take quite a few liberties with the dress, and I wanted to make a apron that wouldn't extend to the sides past the chest area and still had a clearer echo of the drop-shoulder collar on Aurora's dress.

So, between time, budget, and design, I decided to take a chance and make one myself.  I was halfway through experimentally making my first-ever apron, no pattern, no nothing, and it thankfully had already taught me a few tricks about the order of operations.  Unfortunately, I was also running into plenty of difficulties.  For Katie's, I didn't have time to do a mock-up, and the Aurora apron would be more complex than what I was currently making.  I hunted through apron patterns at the fabric store, but none of them separated the top from the bottom in a way that worked with the design I wanted.  So it was all up to brain power.

I spent an afternoon drawing out the basic design, figuring out some basic measurements, and writing down the steps in the correct order.  Even with all that time planning, I still ended up changing things (realizing that certain steps worked better earlier or later), so I won't post my unedited scribbles.  (Although if someone does want clearer instructions, let me know, and I'll try to write up a better version).

The fabric was just the basic bolts on the wall--I didn't want to use fancy-dress fabric for the sake of utility and upkeep, and the cotton bolts were the only fabrics that came in the right colors anyway.  I decided to buy enough for outside and lining on all the pieces, especially since I don't have a serger.  I didn't want any rough edges on this baby.

1. After washing and drying the fabric, I started with the top of the dress.  I used an old sweetheart corset pattern to get the seams in the right places instead of mimicking them with ribbon or trim, like many of the aprons above.  I ended up having to take it in in several places, as Katie is much than I am in height and frame, but I think I estimated it pretty well. I did this for the outside and a lining.

2. Then, I cut interfacing and two of the white fabric (front and lining again) to make the collar and sewed it into the lining.  This was difficult with the interfacing and shaping, especially with how small the collar was.  I also made the neck/shoulder ties, which were excruciatingly thin for turning right-side out after sewing.  I stitched those on the edge of the corset lining, away from the collar.

3. I cut the over-skirt using the measurements of the newly sewn corset top.  I eyeballed most of the measurements, so I can't say exactly how everything measured out.  The big trick was leaving room for the seam allowances to sew front and lining together.

4. Using the same measurements, I cut the underskirt, but I added about 4 inches to the top and bottom measurements so that I could put pleats in according to Aurora's skirt.  The pleats on the animated dress don't really work in real life, but at least it would give a hint of the original and add a little body to the skirt.

5. I basted the over-skirt to the corset front and then sewed the underskirt on top of it, making the pleats by pinning them in and then simply sewing all three layers together.


6. In the picture above, you can see how I finally took pictures after sewing the lining of the corset to the front, just along the neckline.  This was the trickiest part to sew with the sweetheart corset and straight/pointy (and stiff!) collar.  I ended up having to hand-stitch parts of it to get it just right.

We need side straps!

7. I remembered at this point that I still needed the side straps, so I sewed those up and stitched them into the lining.

8. With all the pieces in place, I sewed the sides of the corset, making sure I didn't accidentally catch the skirt or straps.

9. As the last step, I hand-stitched the lining to the bottom seam of the corset front, turning the raw edges in and using an invisible stitch so it looked perfect.  Sadly, I did not take a picture of this moment of subtle artistry.

And voila!  A finished Aurora apron, modeled by yours truly.  The top could probably have been taken in even more, but for a first attempt with no real pattern and without measurements for Katie, I think it turned out pretty well!  The only other thing I would fix is the angling of the bottom of the corset.  I designed it to come to a lower point in the middle, like Aurora's dress does, but I didn't cut enough from the top skirt, and it ended up straightening out.  It looks great on the hand-stitched inside, but then you don't get the over-skirt.  *sigh*

Excuse the mess of broken-down boxes and bed frame that compose the back wall of my craft room.


Friday, November 29, 2013

Vogue 2903 Tutorial


After a long hiatus, I finally return, this time with a rough tutorial for Vogue's vintage pattern 2903!  It isn't perfect, but I haven't found any blog that's discussed the whole pattern. At least as of August, I couldn't find anyone who got to the facings and yoke, the parts of the pattern that give everyone trouble.  Well, I'm not sure how much this will help, but hopefully it will!

Vogue 2903


Note, this isn't going to be a complete step-by-step. There are a few parts I didn't document too well or skipped, but I tried to cover the trickiest parts.

For the first time ever, I did a proper mock-up for this dress, so that's what this tutorial covers.  Anyway, I started off just laying out the pattern.  I wasn't too worried about getting it perfect since I had a ton of muslin.

Sewing up the long seams is pretty easy overall, but the princess seams (the front side seams over the bust) can be a little tricky.  All patterns recommend you clip curves, but I've had a ton that I could get away with very little clipping.  To that end, I'm not all that great with it, but this pattern required it.  BIG TIME.  You will not be able to sew these without clipping, and I found I had to clip a lot to get piece 1 to line up with piece 2--you're essentially clipping to turn a concave curve into a convex.


Note: do like most people who've learned how to sew properly, and put your pins perpendicular to the seam.  This pattern slowly got me doing that a lot more frequently.

 You can see the basting stitch I cut through on this--I put it way too close to the edge and not the seam line.


Once you get these seams stitched up, the pattern has an interesting direction: "Stitch along stitching line between small circles."  You can see the marks on the pattern, but the instruction seems pointless.  This stitching line is to help you form the pleats in the skirt, so, technically, you can skip this step if you don't want the sharp pleats.  A lot of people have chosen to skip this and the other pleat steps, and I ultimately skipped it in the final dress.  Still, if you want to try it, this is what the stitching line basically looks like. Unfortunately, I don't have photos of the pleats I tried on the mock-up, but other bloggers have covered the pleats.


It's a little hard to see, even with the pink thread, so I traced the seams and marked where the circles were with little lines. The arrowed line is the main seam, and the short, straight line is the stitching line.

The zipper is a pretty standard hidden zipper, and there are a ton of good tutorials online for this, so I won't cover it.  Once you get the hand of it, it's actually quite easy.

I cheated for the mock-up and just used a cheap plastic zipper I'd gotten as a crafting hand-me-down.  I didn't even bother sewing around the mechanism in this case. Tsk tsk


And now we get to the facing.  This starts one of the several parts that everyone seems to have trouble with, and it's understandable.  The instructions are pretty confusing and different from any other pattern I've ever worked with.  But if you take your time and read carefully, it's actually not too bad.

First, sew the center seam of the facing pieces, and do your best to hit the small circle accurately.  You don't want a gap happening in the centerpoint as you progress.


Now, press the shoulder to the wrong side of the facing, 5/8" of an inch. (This might actually come first in the instructions, but it doesn't really matter.) If you need to shorten the top/shoulders (which I did on the final version), you can actually take it in by pressing this in further, but be careful that you're accurate on all the facing pieces, front and back.  


Now, pin the front facing to the right side of the dress front.  Note how you keep that shoulder pressing on the facing--the dress shoulder stays normal.


When you sew this seam, do your best to hit the end of your stitching (at the circle) on the facing's center seam.  If you don't, try to hand-stitch the little left of the center seam or redo the sewing you just did.  If it's a small gap, you might not notice it when you flip the facing inside, but it can be annoying nonetheless.


Once you've sewn that seam (your neckline, basically), you sew the other side of the strap down to the circle on the pattern (I'm using the bottom pin to mark the spot on mine).  Note how on the neckline side, my stitching has gone across the pressed part of the shoulder--this is necessary.


And voila!  Neckline and strap stitched.


Do this for both the front and back facing, and then you're ready to move on.

Flip the facings inside the dress, and turn the straps out.  Now, you'll start to see why you did the pressing.  I won't tell you why yet (we aren't there yet in the pattern instructions), but this is what your project should look like at this point.


Now for another weird part.  We need to attach the facing to the dress, and we do that by basically sewing the facing to the dress's seams.  Note, if you have fraying fabric, this can be unforgiving.  On the final version, I actually serged most of these edges, because this dress has no real lining.  My mother-in-law figured out how to use the mock-up as a lining, but I didn't document it, and it had its own complications.  It took us a couple of tries before we got it worked out properly.

But anyway!  Sewing the facing to the dress.  Here you can see where I started at the armpit.  I went way outside the original seam because I had no idea what I was doing.  It's okay to be a little out, but the closer you are, the better.

It's hard to see, but here's the zoomed out version of the other side.  Note that you tack together the center seams.  Pressing the straps and neckline throughout or before this process is a good idea.  My mother-in-law had a magical sewing foot that actually stitched down the neckline on the inside to help the final version's neckline lie flat.  On a lighter fabric (cotton instead of satin), this probably isn't as much of an issue.

The back.


FERRET BREAK!


Okay, moving on.  Now, we can finally sew up those shoulders.  Pin each front shoulder to the corresponding back, matching notches.  The pressed seams will be on the outsides.  Also, if you pressed the seams correctly on the facing, the pressed edges should match as perfectly as humanly possible.  I'm sorry I don't have a side view so you can see it.

 Now, stitch your 5/8" seam allowance across the shoulders, being careful not to catch the pressed edges.

 It's okay if there's a bit of space, but again, you want it to be as close as possible.

Now, it's a little hard to tell what's going on here, but I'm basically turning the raw edges of the seam into the little pocket created by the pressed seam of the facing.  You can see on the right how I accidentally stitched through the pressed seam on that side, but because it was the mock-up, I left it and simply pushed the seam into the open side instead of redoing it and then pressing the seam open and tucking each side into its corresponding pocket.  (I really hope that made sense.)

Here you can just see the notch under the pressed edge.  I don't have an in-progress picture unfortunately, but at this point you slip-stitch the pressed edges together.  This seals the raw shoulder seam inside the straps.  It's actually pretty ingenious.  But this is where you can have trouble making those pressed edges meet without stretching or bunching if you were off in your measurements before.

At this point, you can actually try your dress on without pins!  I found out it was kind of a tent on me.  Even though I followed the measurements exactly, I had a ton of extra space in the waist, so I knew I'd have to adjust the pattern on the final version.


Finally, we're at the yoke.  This part's pretty simple.  Wrong sides together, sew up the neckline, flip right-side out.  Then baste/stitch/serge the outside edges.

Now we start the sleeves.  First, do the cuffs and sleeves....

Then sew each cuff to its corresponding sleeve...

Flip the cuff inside and stitch it in (no pics of that last step, sorry)....

And now, you're ready to attach the sleeves to the yoke!  If you choose to make the dress without sleeves, you can skip all these steps with the sleeves, but you have to make an armpit facing essentially.  I chose to leave the sleeves off the final version because they didn't look good on me, and my mother-in-law made the facings (again, why didn't I document THAT?).

 This part actually tricked me, and I put the sleeves on the wrong way!  I had to undo it and think about it for a few minutes.  Making sure you have the correct sleeves on the correct sides, and lay them out like this:


Note, they are inside-out, with the armpits facing the yoke.

Now, when you flip everything right-side out, it should look like this!


Now we insert the yoke and sleeves into the dress.  Baste, sew, or hand-stitch the yoke to the seams of the facings. The tack at the center seam and moving from the side seams to bottom facing seam canmake machine sewing this tricky.  I chose just to hand-stitch mine.


Again, this isn't a great picture, but now you sew the armpit of the sleeve to the armpit of the dress.  If you've been good about matching circles and following seam allowances, this shouldn't be too difficult.  If you weren't, you might have trouble at the point where the straps hit the rest of the dress (basically the connection between front and front side pieces and back and back side pieces). 


Lastly, check your length and sew up your bottom hem!  This pattern was super long on me.  I wanted it to hit just below the knee, so I ended up altering the pattern to be about 5 inches shorter. 


And we're done!  Next time, I'll talk about what I did with the final version to make the final dress design unique for the wedding!